We are firm believers in sharing our knowledge with our fellow knife-makers. We therefore would like to give you the opportunity to share your knowledge as well by sending us any knife-making tips that you might have. Tips can be e-mailed to This email address is being protected from spambots. You need JavaScript enabled to view it.. All tips will be posted on our website.
There are three key aspects to consider when seeking the perfect bonded joint:
- The right adhesive for the purpose. Silicon sealer is great for filling gaps in bath tiles, not so good on knife handles. As knife-makers, most of us have come to the agreement that epoxies are what suit our purpose best. I have found the slow curing types to be more convenient and allow leisurely assembly. There is nothing worst than still positioning handle slabs with glue that is halfway cured. Schedule your time that handles cure overnight, ready for shaping in the morning.
- A close fit not only looks good but ensures a stronger bond between the two materials. Strive for two perfectly flat surfaces meeting. Do not rely on the epoxy to fill gaps.
- The surface preparations is important.
Just prior to spreading on the epoxy, using 180# paper roughen up the inside of the handle slabs as well as the tang. Using tissue paper and a bit of acetone, gently wipe all surfaces clean. Don’t forget to prepare the pinning material. I knurl the pins by rolling them between a flat piece of steel and a fine file. When applying the glue, use a spatula and mush the glue into the wood grain and all nooks and crannies. Learn to estimate how much glue to mix so that not too much is squished out and wasted. Too little is also bad, don’t try to skimp.
Kevin Harvey
If you use a disc grinder and struggle to get paper off the disc, before applying contact spary adhesive to paper, spray it with clear aerolak quick drying spray. Let it dry and then spray it with contact spray adhesive and it will peel off like a banana. It is not necessary to clean disc with every paper change.
Wollie Wolfaardt
Drills are getting more expensive every day. To economize in knife-making one has to get the most out of your belts and drills. Incorrect speeds will result in high turnover of drills.
The speeds below are what I use but these are not the last word in drilling speed and I encourage you to use these speeds as a starting point when working out speeds that will work for you. Cobalt drills also cut better than HSS bits.
Cooling fluid is important to use as well. Tapmatic will work on every metal except Aluminium (use No.2 Tapmatic)
Blade Material.
N690, 440C, 440B, ATS34, 12C27 & Damascus:
| 1.6mm | ± 1000rpm |
| 3.0mm | ± 400rpm |
| 6.0mm | ± 240rpm |
303 Bolster Material:
| 1.6mm | ± 1200rpm |
| 3.0mm | ± 900rpm |
Andre Thorburn
When purchasing Damascus steel make sure that the seller can supply you with heat treatment specs, so that you can do the heat treatment yourself or ask if he can offer you a heat treatment service at a nominal charge. Do Not sent Damascus blades to a commercial heat treater, as they will not use any specs you might give them, but rather they will heat treat the blade along with whatever they are heat treating at the time.
The Edgehog
If you have some animal bones. Boil them in a solution of bleach and salt, in order to kill any bacteria. Dry thoroughly.
Stag horns are quite fatty so boil them and dry thoroughly before using. To bleach wood before stabilizing or to re-colour in order to obtain a uniform finish – use a 50% peroxide & 50% ammonium hydrate solution. This can also be use on bones to bleach and sterilize them.
Knife club meeting
How to make that expensive Bimetal band saw Blade go the maximum distance.
- Cut your Brass or Nickel Silver bolsters first. If you don’t use these materials for bolsters, cut into a bar of Brass anyway, simply to run the blade in. The extremely sharp edges of a new saw blade can quickly be broken or pulled by carbon or stainless steel.
- Always mark out blades in alternative positions, one blade pointing right and one pointing left. This ensures equal stress on the machines guidance system and prevents the blade developing a bias to cut in a particular direction and eventually rendering it useless for normal work, while still being able to cut in a circle.
- Always cut the thicker metals first, the 14 T.P.I generally available, is already pressing its luck with 5mm material ideally 3 teeth should cover the thickness of the material being cut. As the blade gets blunter, use it for 3mm carbon steel. After that use it for 1,5mm to 1mm stainless or Titanium liners for folders.
- The thinner 1,5mm to 1mm material cuts better if glued to +-3mm hardboard. This also helps for steering control and reduces noise and vibration.
Fanie le Grange
Always etch logo on the left hand side (Presentation Side) of the blade unless your client is left handed in which case the presentation side will be the right hand side of the knife. The logo must be close to the bolster and as high as possible to the blade spine – Remember your logo is an advertisement so you want it to remain on the knife.
Marietjie Thorburn
The Bandsaw is probably the no.1 elbow grease saver in a knife-makers workshop…for those fortunate to have one.
But if you do not own one of these machines, despair not as this tip will lessen the effort of using the trusty old hacksaw:
Best: Buy some bi-metal blades 14TPI x 12mm wide in multiples of 315mm (the length of the typical hacksaw blade) from Toolquip or Band Sawing Services, then using a carbide drill (Sharpened masonry drill) duplicate the holes to correspond with an ordinary hacksaw blade. (holes 4mm) Now grind away the back of the blade to leave a blade approx. 6mm wide, leaving the sides with the holes, full width. This blade cuts around tight radii and will amaze you with how little effort this blade glides through steel!!!
Bertie Rietveld
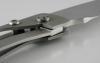
- Your pin stick out half of its dia. On every side of the bolster before peening. It is also essential to round the corner a little , so that the pin starts expanding from the center and doesn’t just mushroom at the edges.
- Always anneal the pins, so they are soft and peen over easily. Brass – heat up to a dull red and quench in water. Stainless (303,304,etc.) – heat to almost yellow and quench in water (1090).
- If horror of horrors, you grind off the peening and see a little tell tale ring around the pin, count to ten, slowly, then go fetch some help to hold the knife with the bottom side of the pin firmly on an anvil or railtrack (just watch out for oncoming trains at this point!) and with a small domed punch, run around the pin, softly hitting the offending area. Chances are you will have solved the problem and the pin will not be visible!!
Bertie Rietveld
Step 2: Etch your image.
Step 3: Fill you etched image with nail polish, your choice of colors.
Step 4: Clean up image area with 600# or 800# paper.
Step 5: Etch out your Damascus pattern.
Step 6: Use MEK to remove the nail polish.
Master Knife-Maker Bill Levengood
When marking dark handle material for cutting, cover the handle material with masking tape first. It's much easier to see a line drawn on masking tape the same line drawn on black micarta. Masking tape is cheap. Handle material is expensive. Not.
Speaking of masking tape, after you've worked your blade down to it's final finish, cover it with several protective layers of masking tape. Removing masking tape is easy. Removing scratches is hard.
John Ownby
To avoid burning your fingers whilst grinding the blade or flattening bolsters, etc on the disc sander .... simply stick 2 pieces of 3mm double sided mirror tape together (about 10 x 10mm) and stick this to the bolster/knife you want to hold.
This tape sticks very well and does not come loose when the work piece gets hot and can be dipped in water as well.
Bertie Rietveld